- 30 May 2024
How to create a website starter kit for Umbraco
How to guide in crafting your own starter kit for Umbraco CMS.
Why create starter kits for Umbraco?
In a previous article, we highlighted many reasons, why starter kits are important for website development in Umbraco. In a few words, starter kits greatly speed up the development process. Imagine you decided to create your starter kit and don't know where to start. This article will describe in detail all the stages and pitfalls of creating a starter kit, just like we did with our Digital Agency Starter Kit.
Creating a starter kit for Umbraco
Step 1. Extract C# code
The first thing to do to create a starter kit (or NuGet package) is to extract all the C# code into a separate library and add it to the project as a dependency.
This library should contain all controllers, composers, content finders, URL providers, middleware, recurring background jobs, migrations, property converters, services, and models.
Attention - this does not apply to models generated by ModelsBuilder!
The code in this library must know nothing about models from ModelsBuilder. They cannot be used in all the entities listed above. You can use only the classes and interfaces contained in the Umbraco.Cms.Web.Website and Umbraco.Cms.Web.BackOffice packages. Models from ModelsBuilder can only be used in views.
Make sure not to make any changes to Startup.cs and appsettings.json.
Because later, when the user installs the package, it will be impossible to change these files. All settings must be made through composers. And if some data needs to be saved for the user, then when installing the package, you can create a custom table for this in the database, or use IKeyValueService for this. More details here.
Step 2. Create a Package project
The next step is to create a Package project. To do this, you must select the Umbraco Package type when adding a new project to the solution.


The contents of the App_Plugins and wwwroot folders (except for the media folder) must be copied into this project immediately before packaging. Optionally, you can copy the desired views from the Views folder. This should be done if you must overwrite some bugs when updating the package version because they cannot be overwritten due to migration. You can only add new ones.
Step 3. Migration
For the user to have some content when installing the package, for example, datatypes, doctypes, files, media files, content, etc., it is necessary to package it all.
This is done in the Umbraco back office, in the Packages section, in the Created tab.

Here you need to create a new package, give it a name, mark what needs to be packed, save, and download the zip file.
This zip file should be placed in the Migrations folder. More details.
For the package to be displayed correctly in Packages/Installed after installation, the package's name must be spelled correctly in the migration plan designer.

For installation statistics to be displayed correctly in the Umbraco marketplace, you need to write the package id in the package.manifest.

Result:

Special attention should be paid to the buildTransitive folder. It contains the .targets file, which describes what and where will be copied when installing the package. This file name must match the package id for this to work!
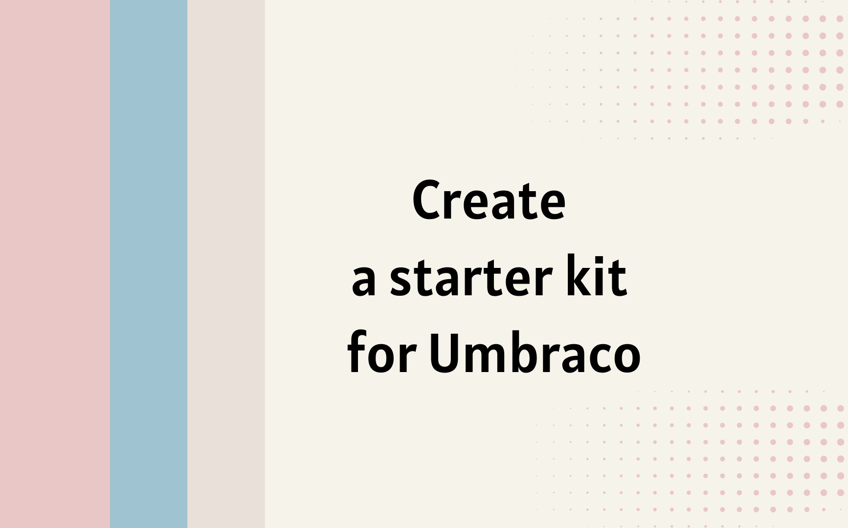
The content will appear in Umbraco after successful migration when installing the package. But it will not be published. To publish it, you need to describe it in the MigrationPlansExecutedNotification handler.
Step 4. Describing the package
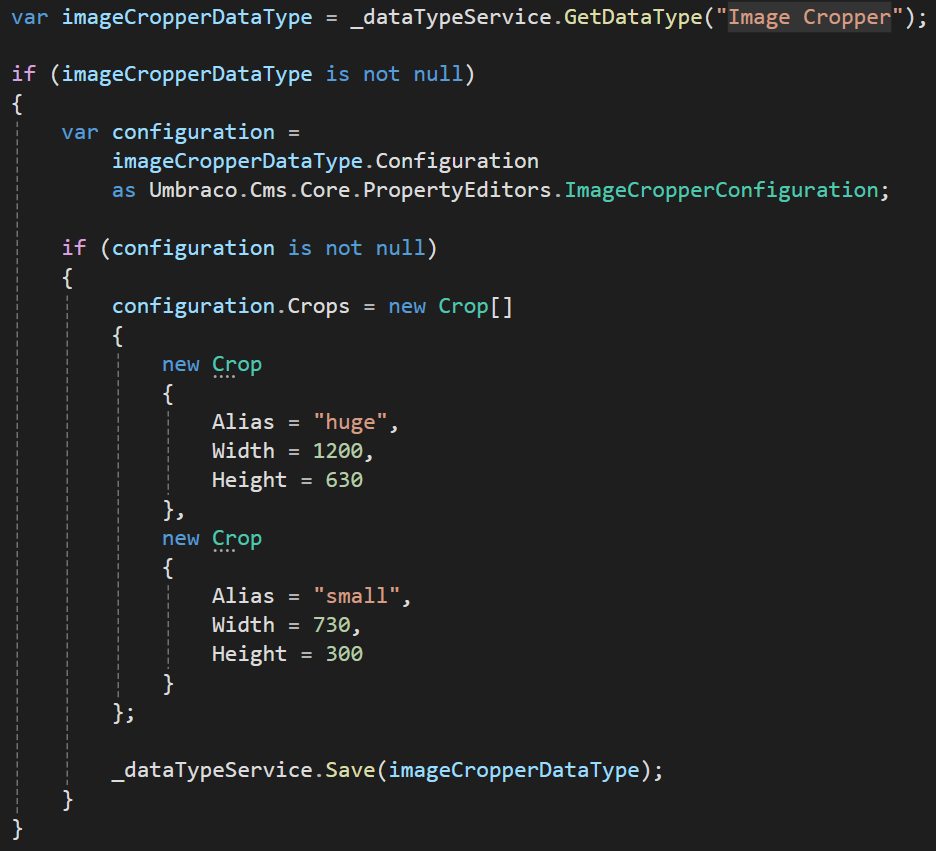
Sometimes, depending on the specifics of the package, other actions that must be performed after a successful migration should also be described in this file. For example, in the Digital Agency Starter Kit, domains for English and German languages had to be added.

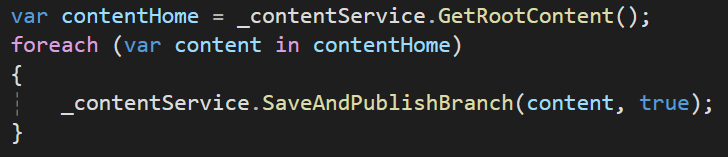
It is also necessary to clear the cache for tags.
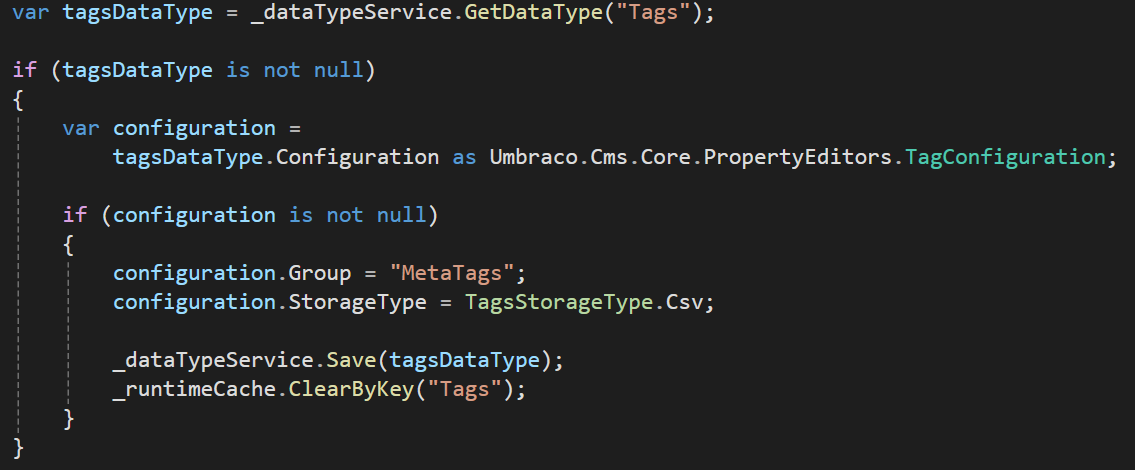
And add crops for Image Cropper. For some reason, they were not automatically imported.
And finally, don't forget to describe the package correctly.
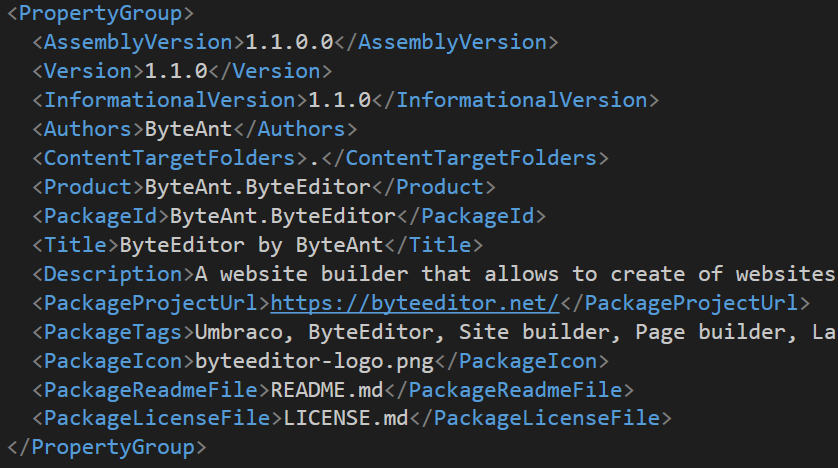
If you want to publish the package on Umbraco Marketplace, the umbraco-marketplace tag must be among the tags.
For the package description to be complete and contain images, a special json file must be placed at the root of the site specified in PackageProjectUrl. More details.
You should also add the logo, readme, and license.

The license should be added as a txt or md file. It is no longer possible to add as a link. More details.
Step 6. Now let`s pack it!
First, the Core library. Set Configuration Release, right-click on the project and select Pack. A .nupkg file will appear in the Bin/Release folder.
Copy it to the local repository.

Include it as a dependency in the Package project.

Pack the Package project.
Also, copy the received file to the local repository, to install on a clean Umbraco, and make sure that everything is ok, and everything is installed as it should be.
If everything is ok, upload both files to https://www.nuget.org.
Sum up
Creating a starter kit requires programming skills. You also need to understand the Umbraco ecosystem and how it works. If these conditions are met, you can create your customized starter kit. But you should understand that creating and publishing a starter kit is not the end of the road; you will also have to support it and answer user questions, as well as port it to new versions of Umbraco. We have been developing starter kits for some time and already released a SaaS website starter kit. Get familiar with our next-to-come starter kits.
You might also like
- 07 May 2025
Umbraco Block Grid Editor Explained
The Umbraco Block Grid Editor is a powerful property editor that lets developers build rich, component-based layouts. Introduced to replace older grid editors, it supports modern page design with nested blocks, layout control and flexibility, while making content editors experience better. If you’re building content heavy sites, understanding the block grid is key to mastering Umbraco page layout.
Best Articles


Best templates for Umbraco CMS

Umbraco Block Grid Editor Explained

Best tools for SEO optimization in Umbraco
