ByteEditor Website Builder
Wiki menu
Custom CSS for the Headline element
By following the steps in this instruction, you will be able to add custom CSS for the Headline element. You can use the code snippets provided in the guide to recreate this element, or you can modify the steps to tailor the element to your specific needs.

Step 1. Add custom CSS code
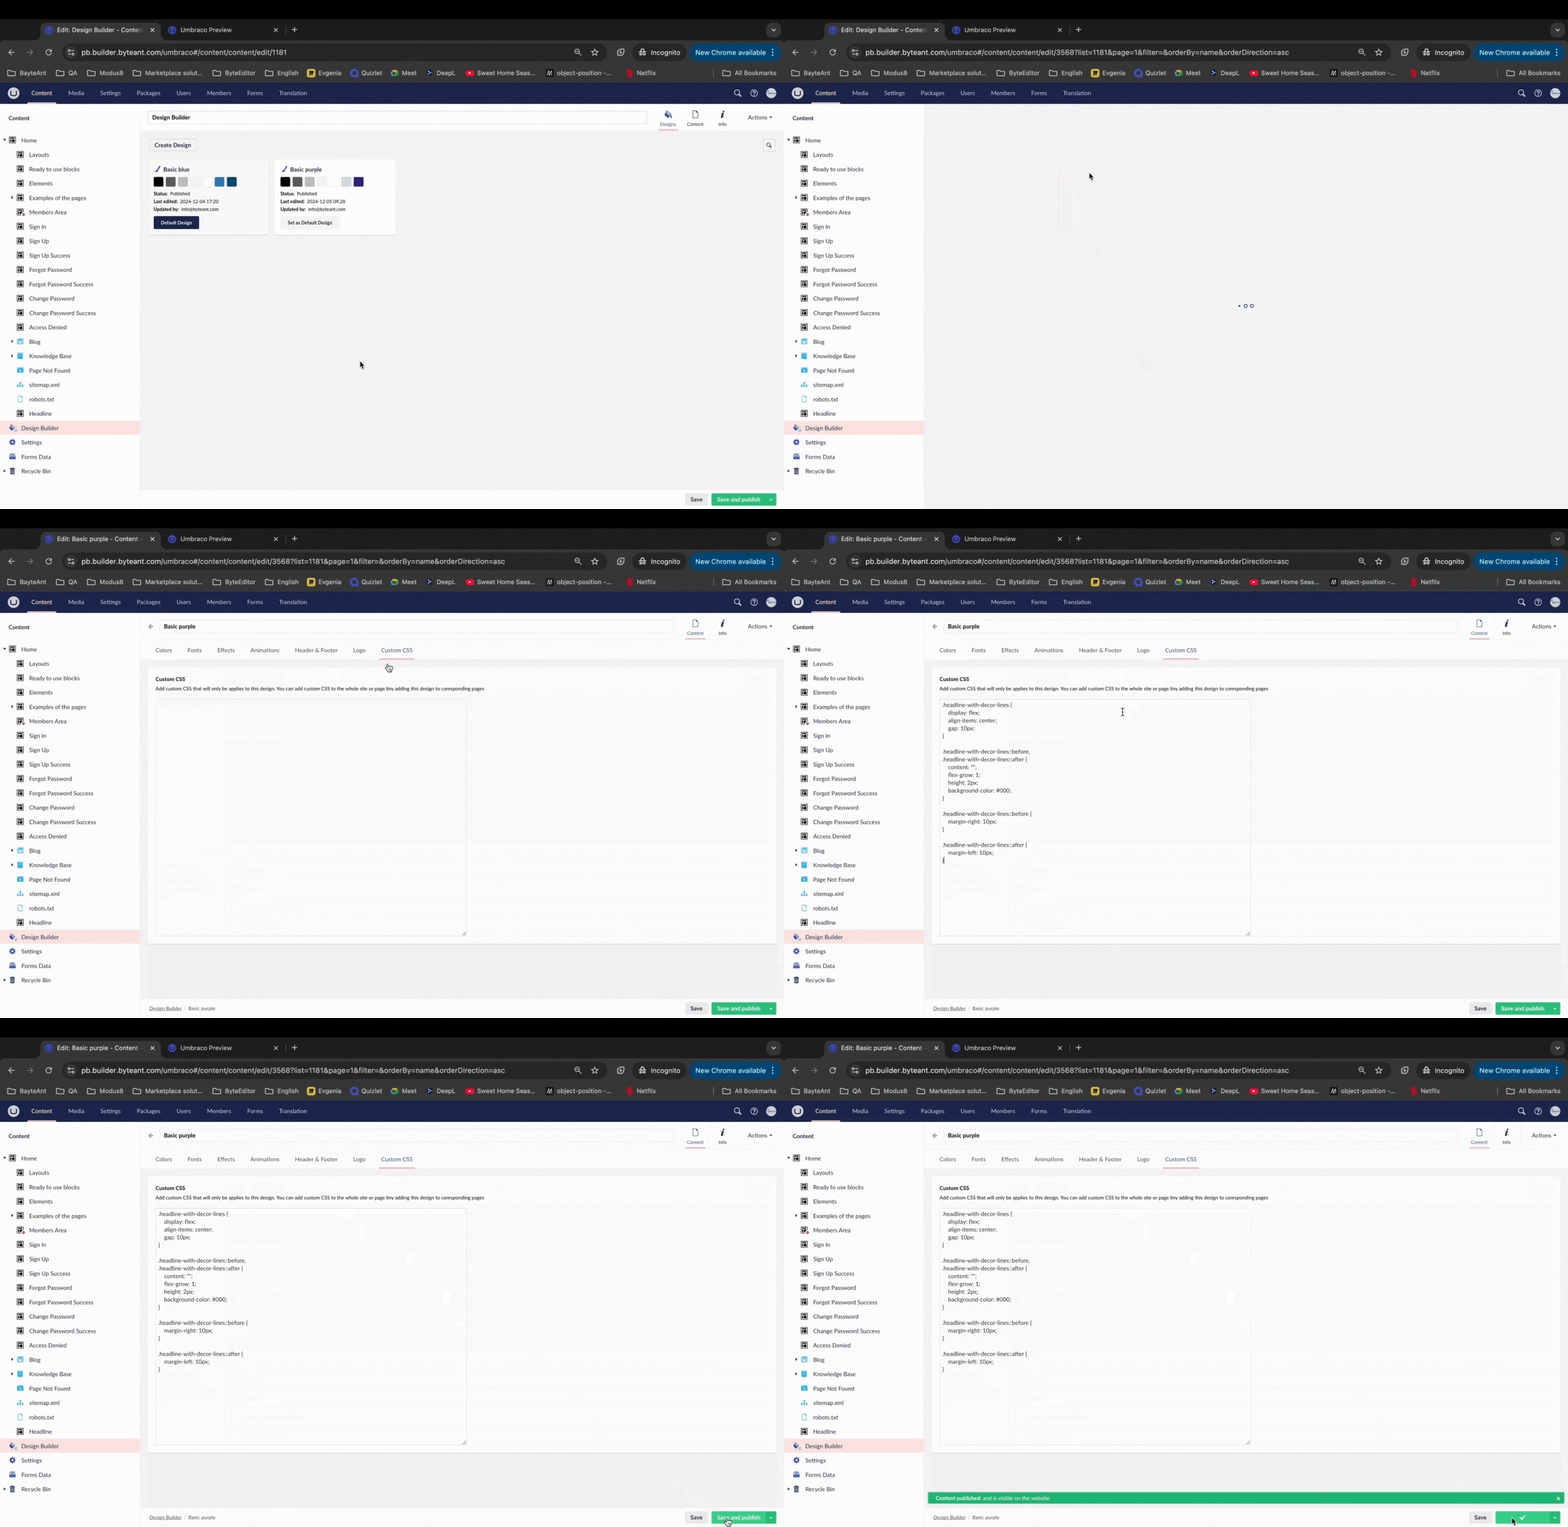
- Open the design page you've chosen
- Go to the Custom CSS tab
- Please copy the following code and add custom CSS code in the provided space

⚠ Note
Please note that the design with Custom CSS must be specified for the page where you want to change the elements
Step 2. Add custom CSS classes
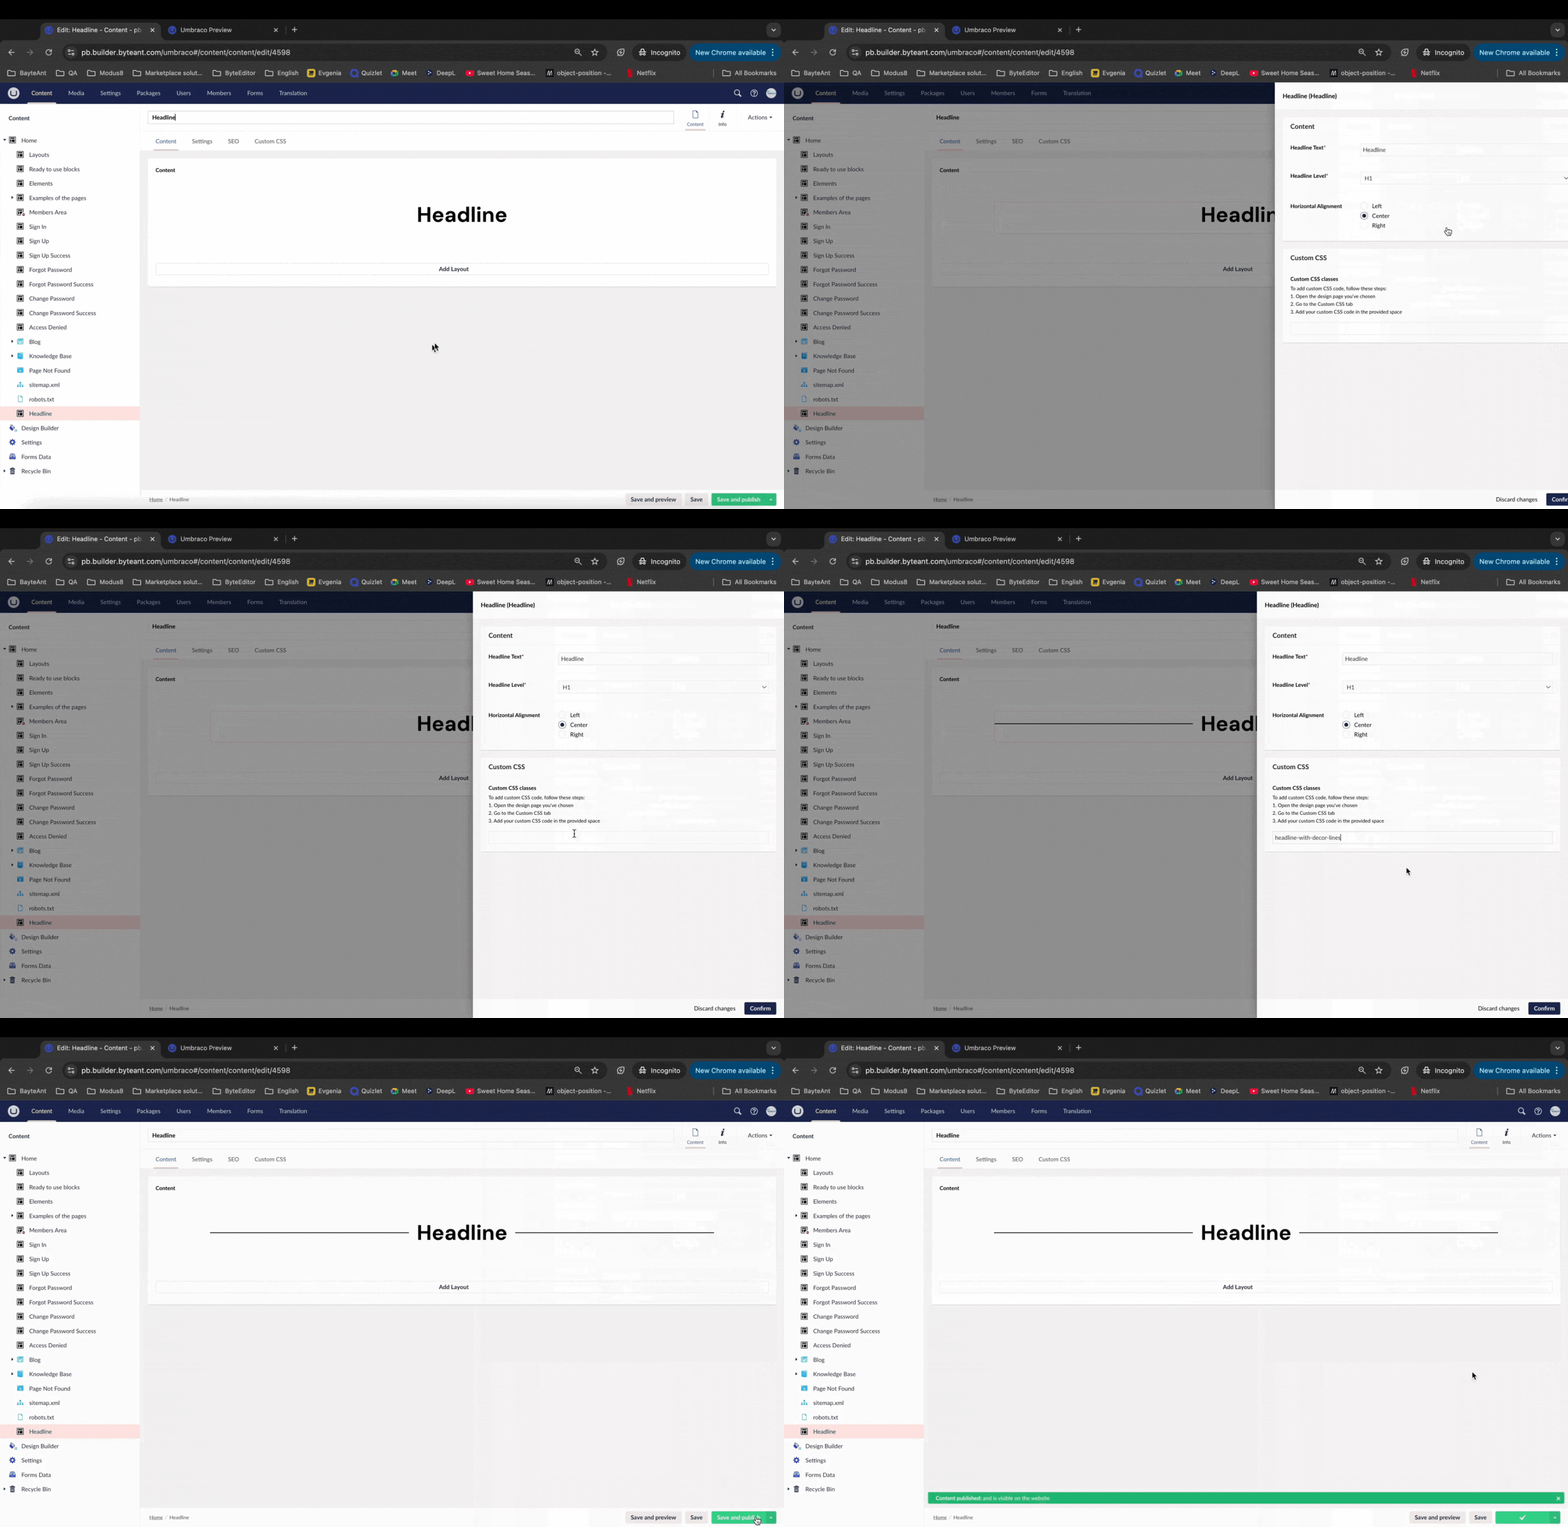
1. Open the page with the Headline element
2. Click on the Headline element to open the right-side menu
3. Copy the following custom CSS class and add it to the Custom CSS field

Congratulations!
You now know how to add custom CSS code to your elements.
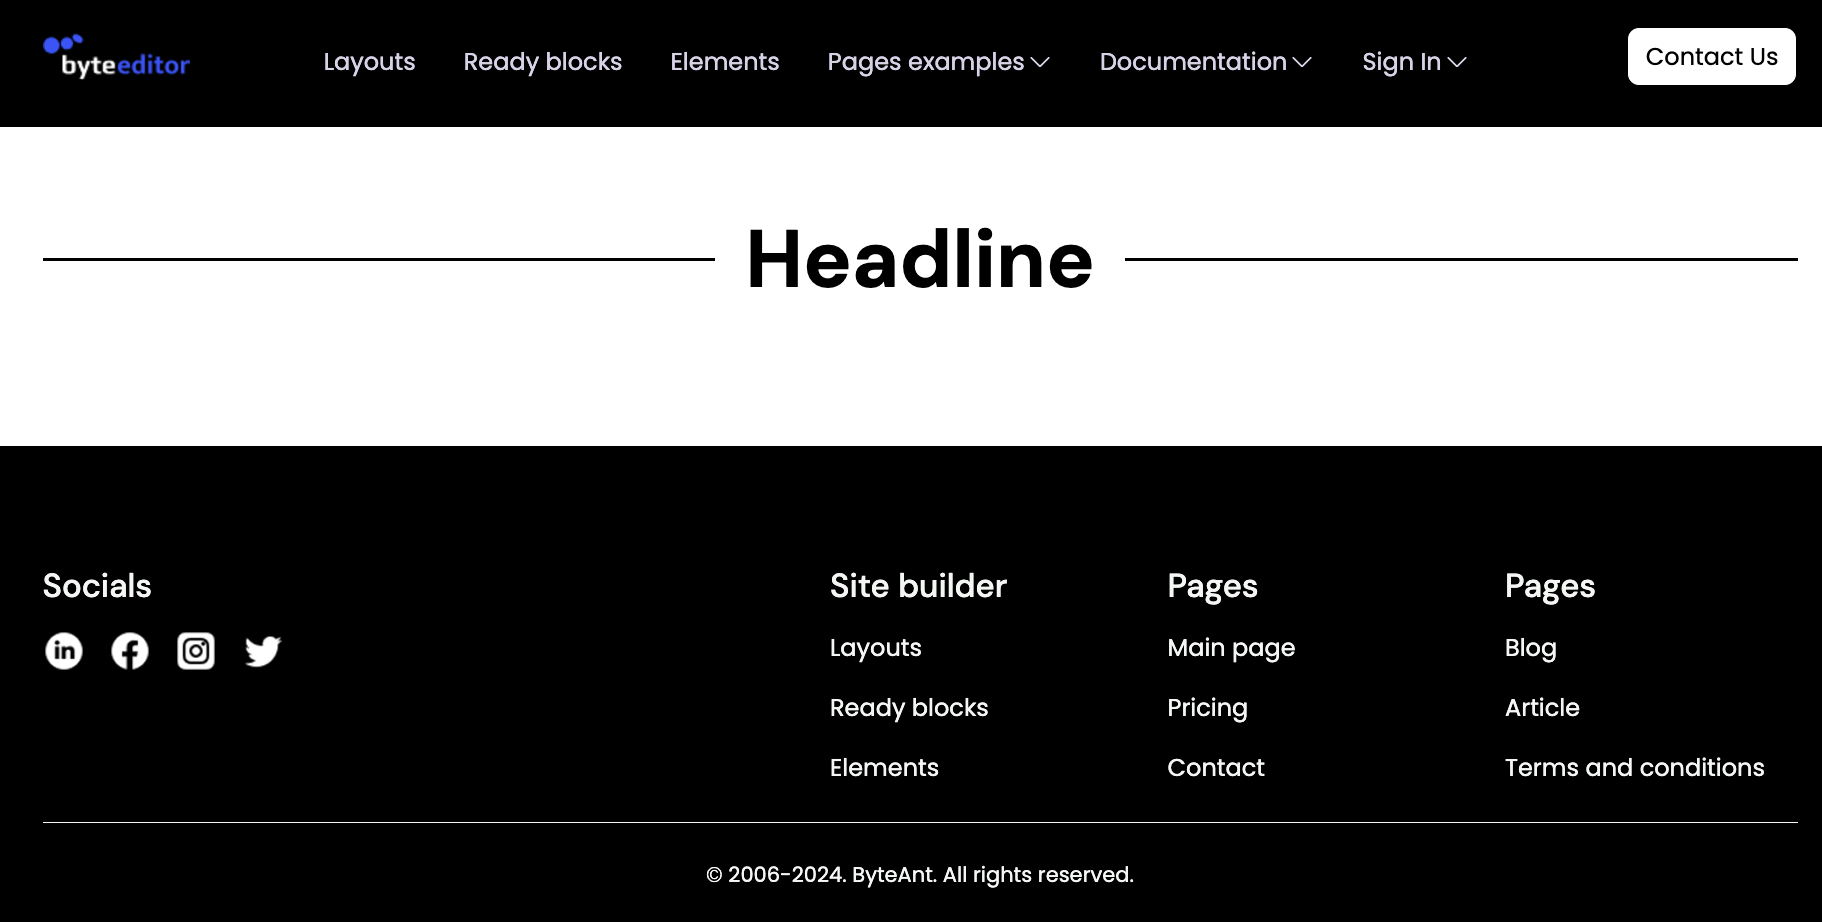
The result of the work done!
