ByteEditor Website Builder
Getting Started with Your Website
Create and customize your site with ByteEditor in minutes, no coding required.
Follow these quick steps to go from a fresh install to a live website on Umbraco.
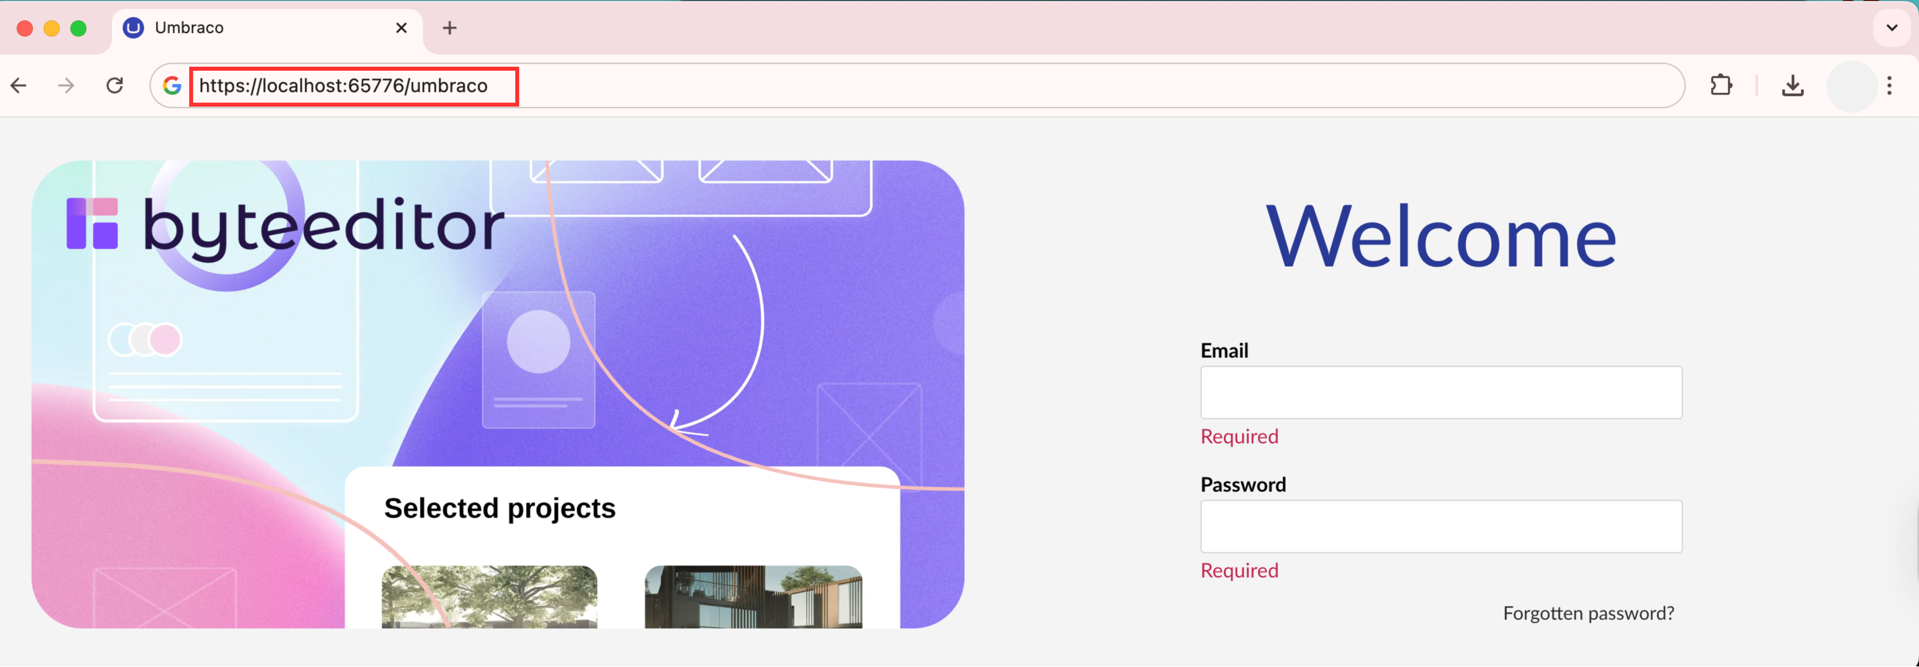
Step 1: Log in
Enter yourdomain.com/umbraco to log in and access the ByteEditor Back Office.
If you sign up for a hosted version of ByteEditor, you can use the direct link provided in the welcome email you received after registering.
Once logged in, you’ll have access to your content tree, design settings, and the visual editor.
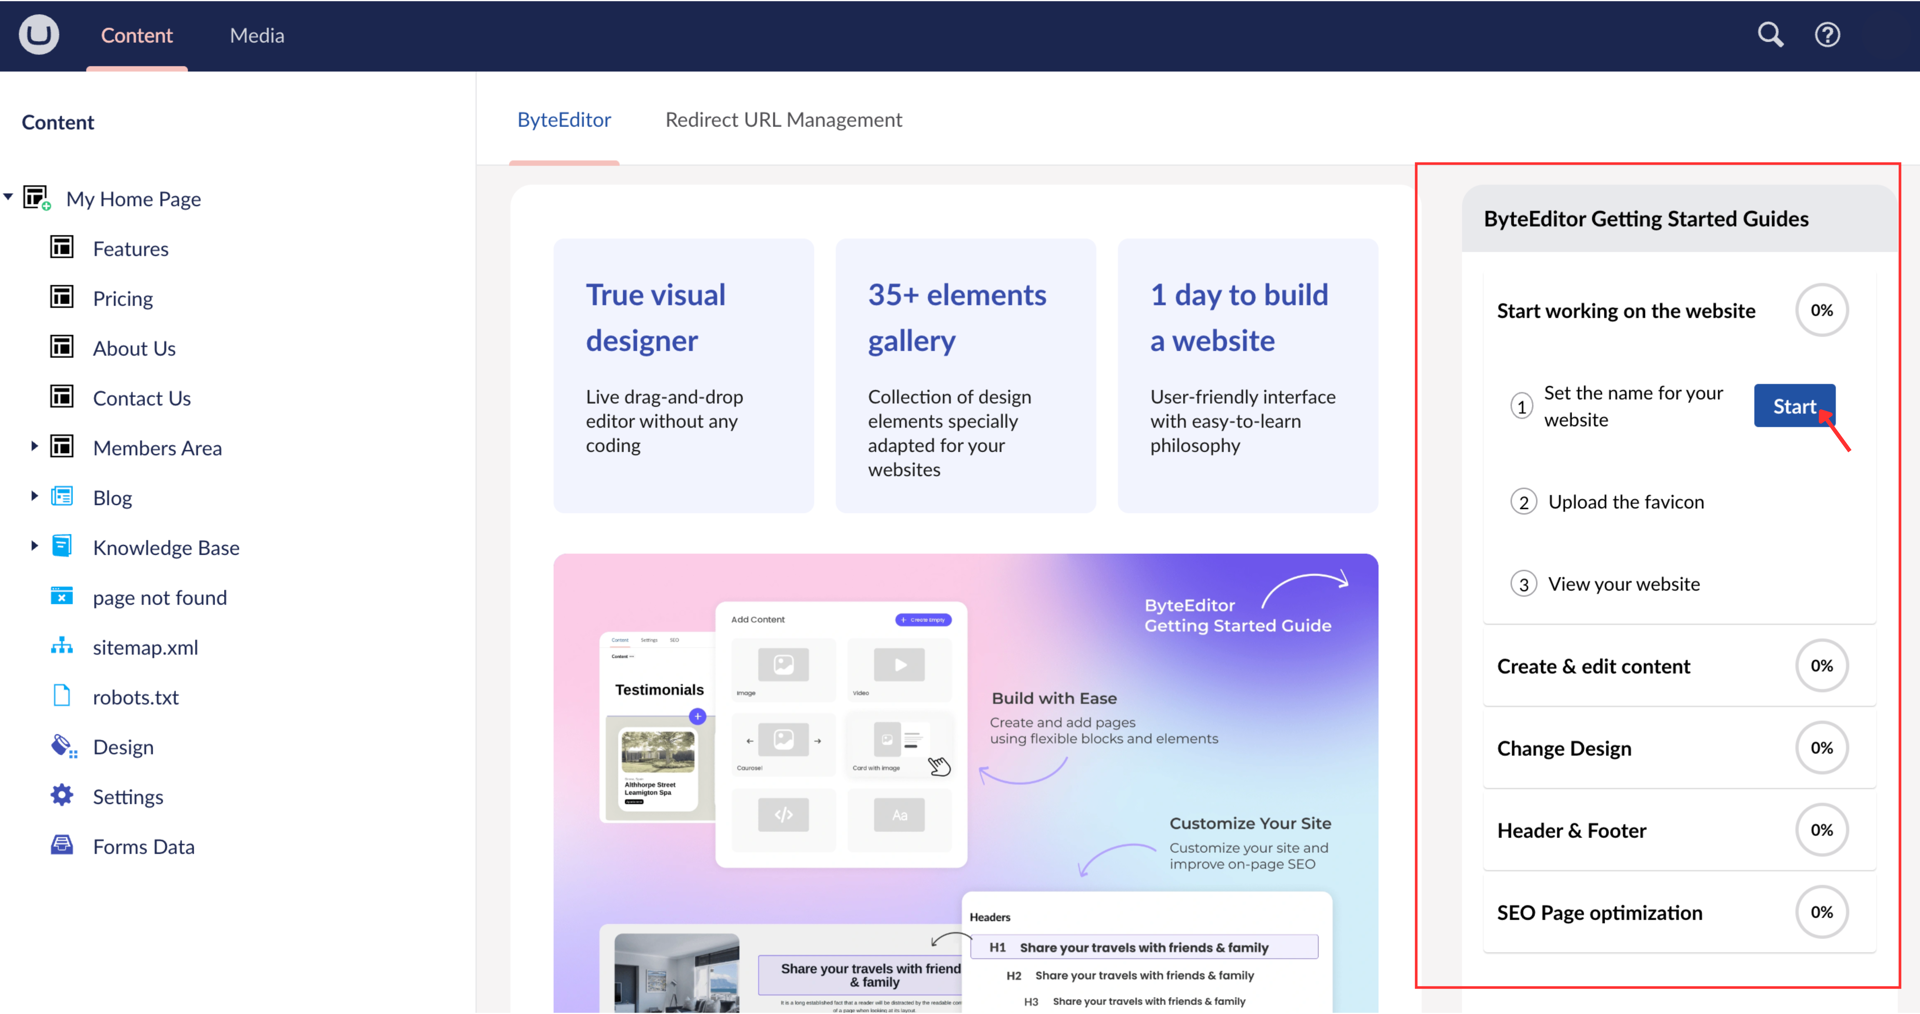
Step 2: Explore the Welcome Guide and familiarize yourself with ByteEditor
ByteEditor includes a built-in Welcome Guide to help you get familiar with key features right away. You’ll find it in the right panel under “ByteEditor’s Tours”.
Click to start the walkthrough - it’s a quick, interactive way to learn how to use the visual builder, edit content, and manage settings.
You can skip it or revisit it anytime later if needed.
Step 3: Review and Try Ready-to-Use Pages
In the Content Tree, you’ll find pre-built pages for different site types (e.g., real estate, restaurant). Expand the Home Page and browse the pre-built pages to see layouts and styles.
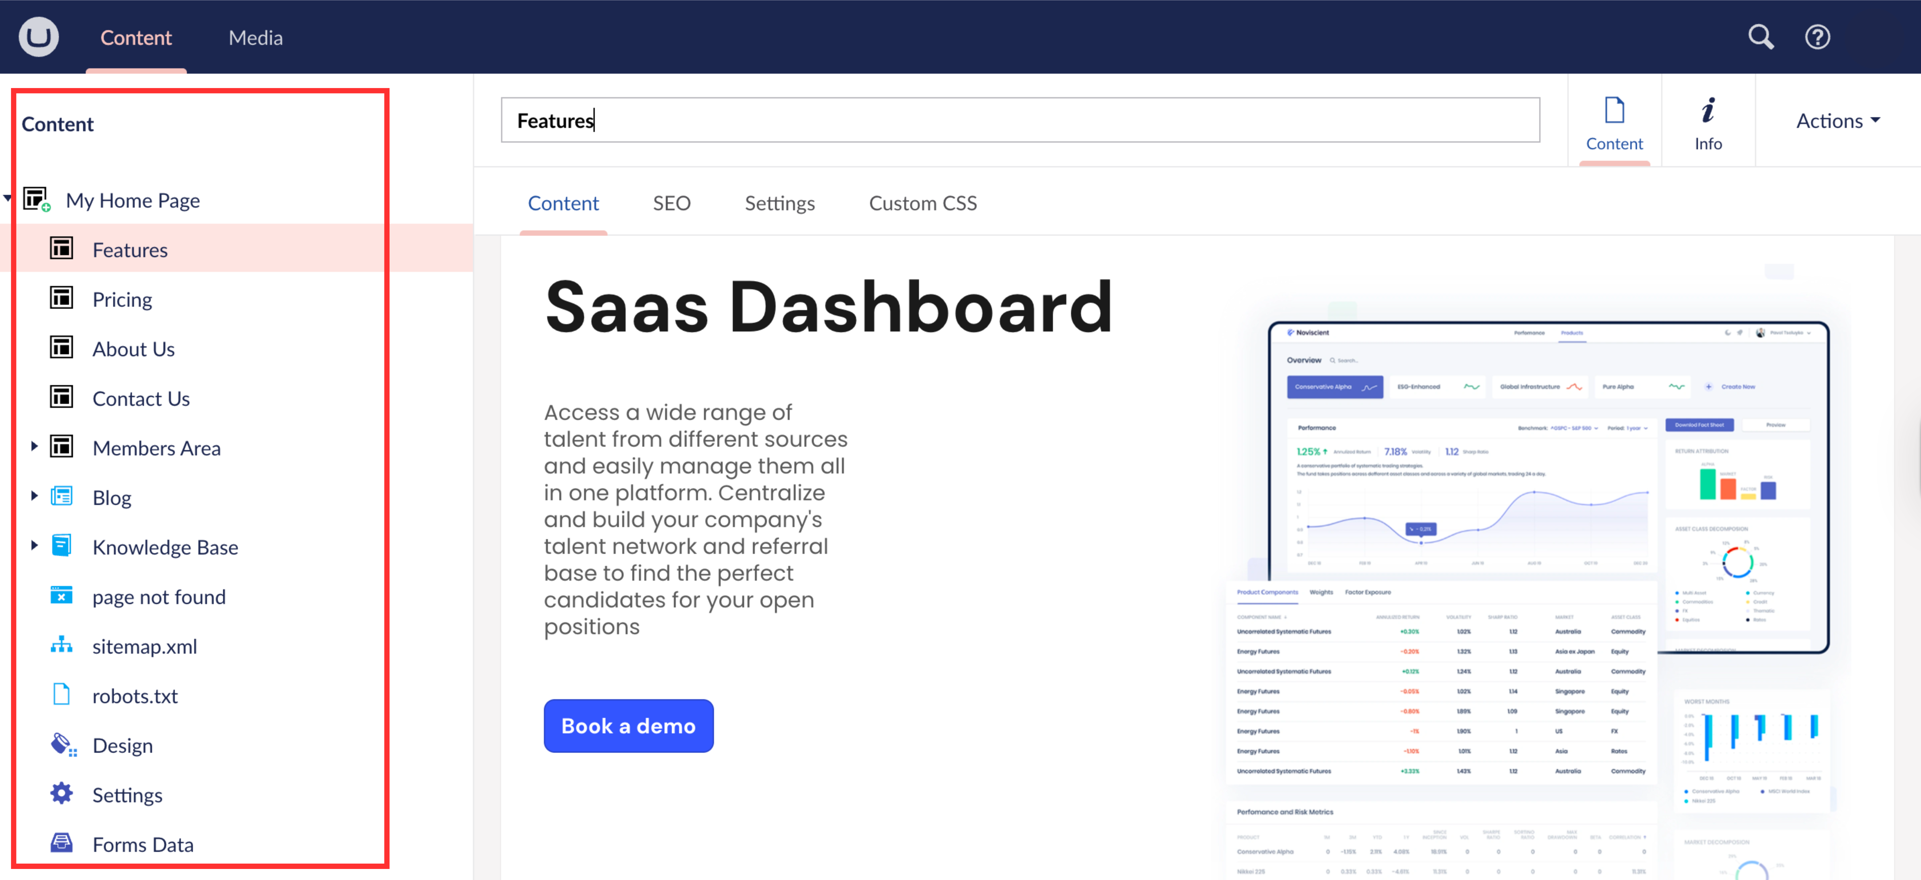
Step 4: Edit Page Content
Click on a ready to use page to view its content.
A page in ByteEditor consists of 3 types of components or building blocks:
- Layouts (or Containers) that define the number of columns for the page builder.
- Pre-Designed Page Blocks that take whole page width, like a Banner.
- Page Elements and Cards that can be added into Layout columns or dynamic areas of Page Blocks.
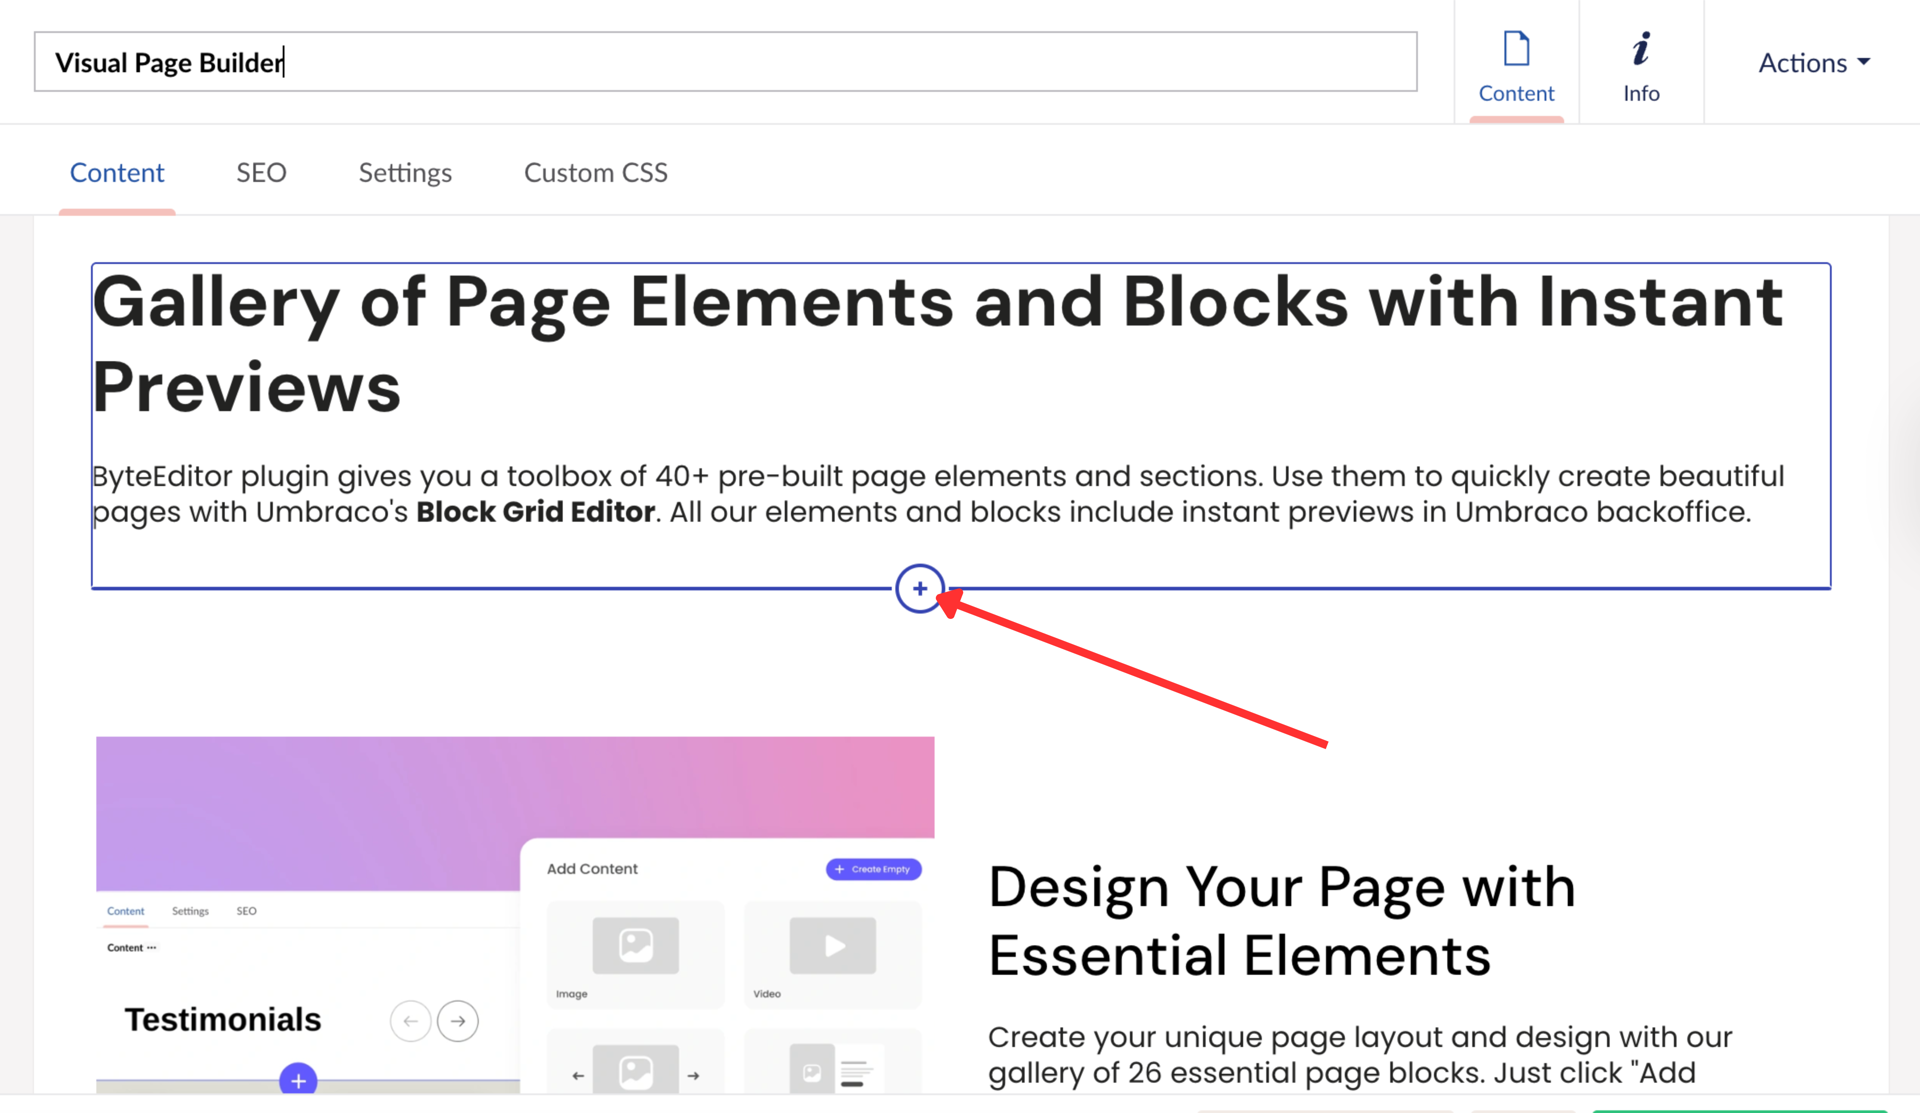
To customize your page, simply click and drag elements to rearrange sections as needed. You can move headers, images, buttons, and more using the visual editor.
To make changes to a specific page component (like padding, links, or background), click the Edit icon to open its settings panel. Make your adjustments and instantly preview them on the left side. You can make multiple changes without saving the page. When done, don’t forget to Save or Save and publish.
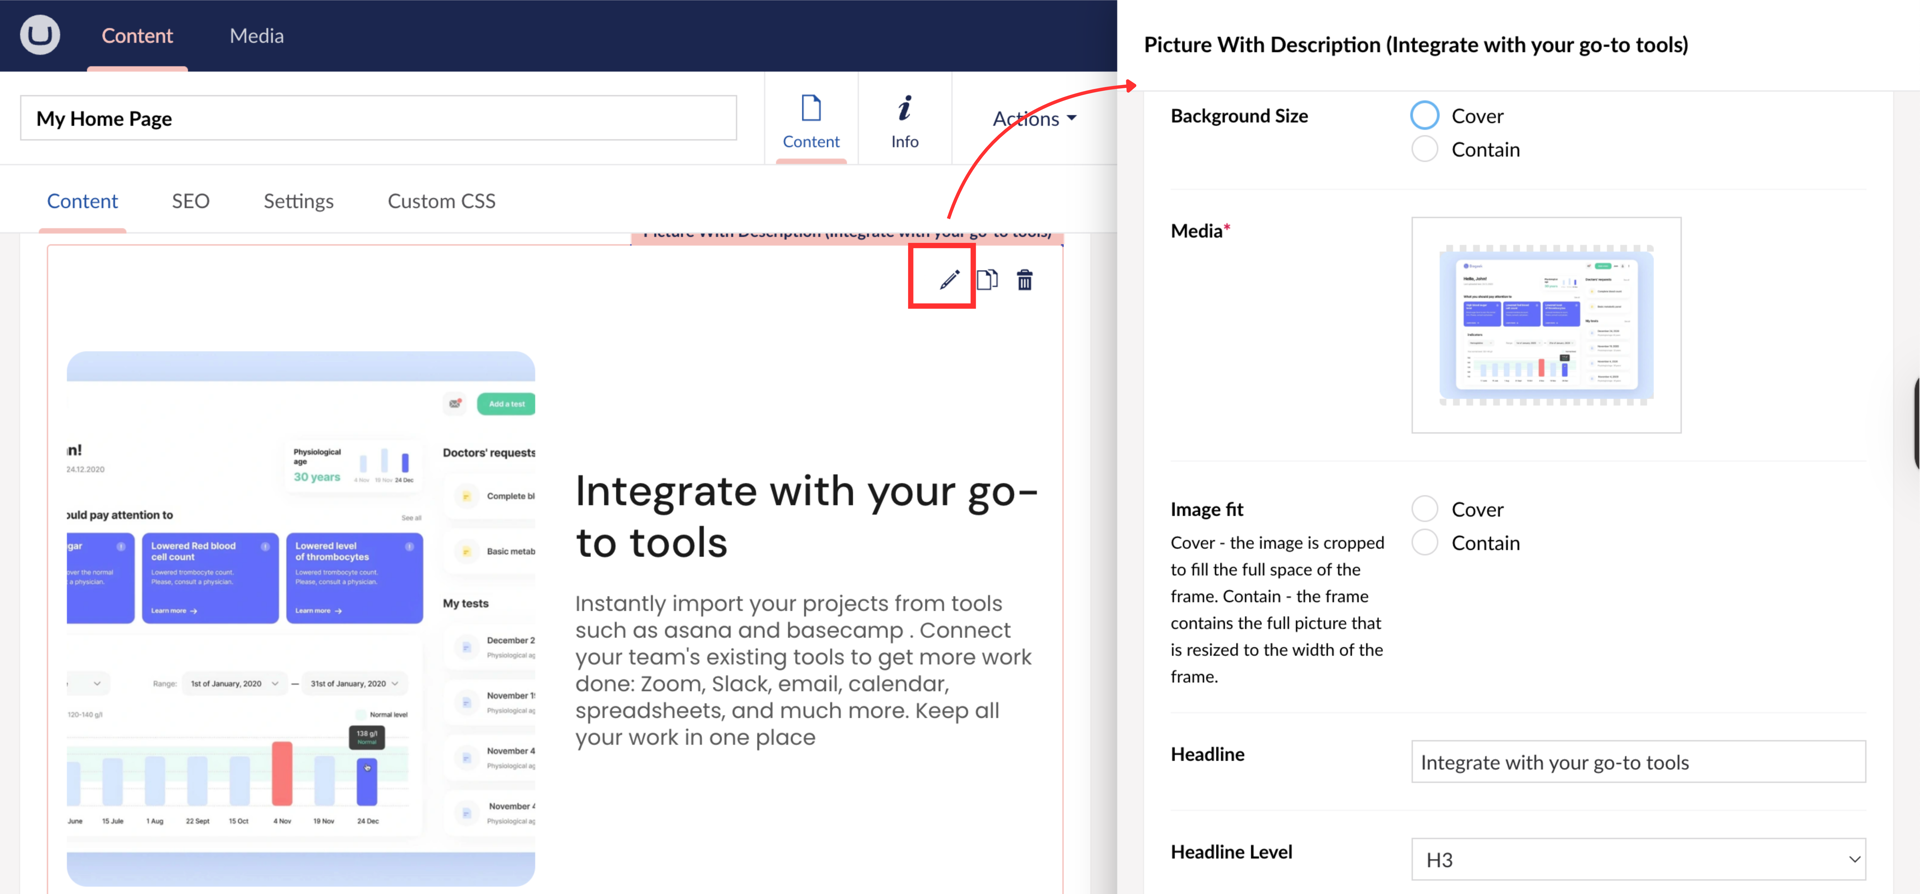
To add a new page component, hover on a divider and click “+” or click “Add Layout” at the end of the page.
See our user guides for Visual Page Builder to learn more:
1. Add a Layout
2. Add Ready-to-use Blocks
3. Insert Elements
Step 5: Style Your Page Elements
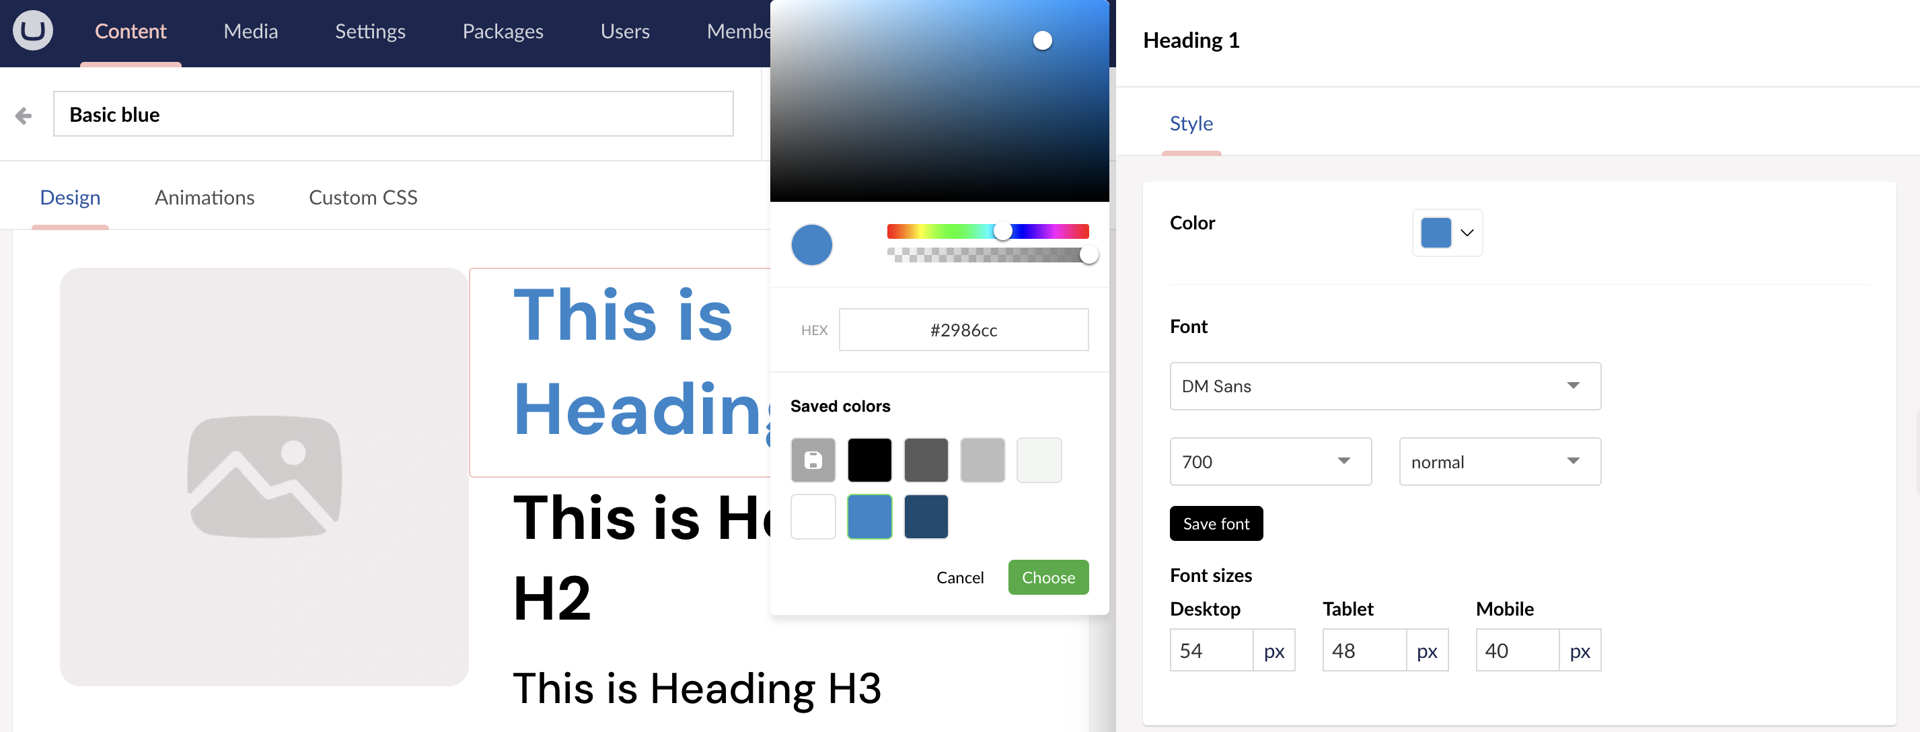
To style your page elements, click on the edit icon of the specific element, in the new window scroll down to Styling, here you will see different design, you can choose one, create a new one or edit the existing one.
You can also add your Custom CSS for specific elements.

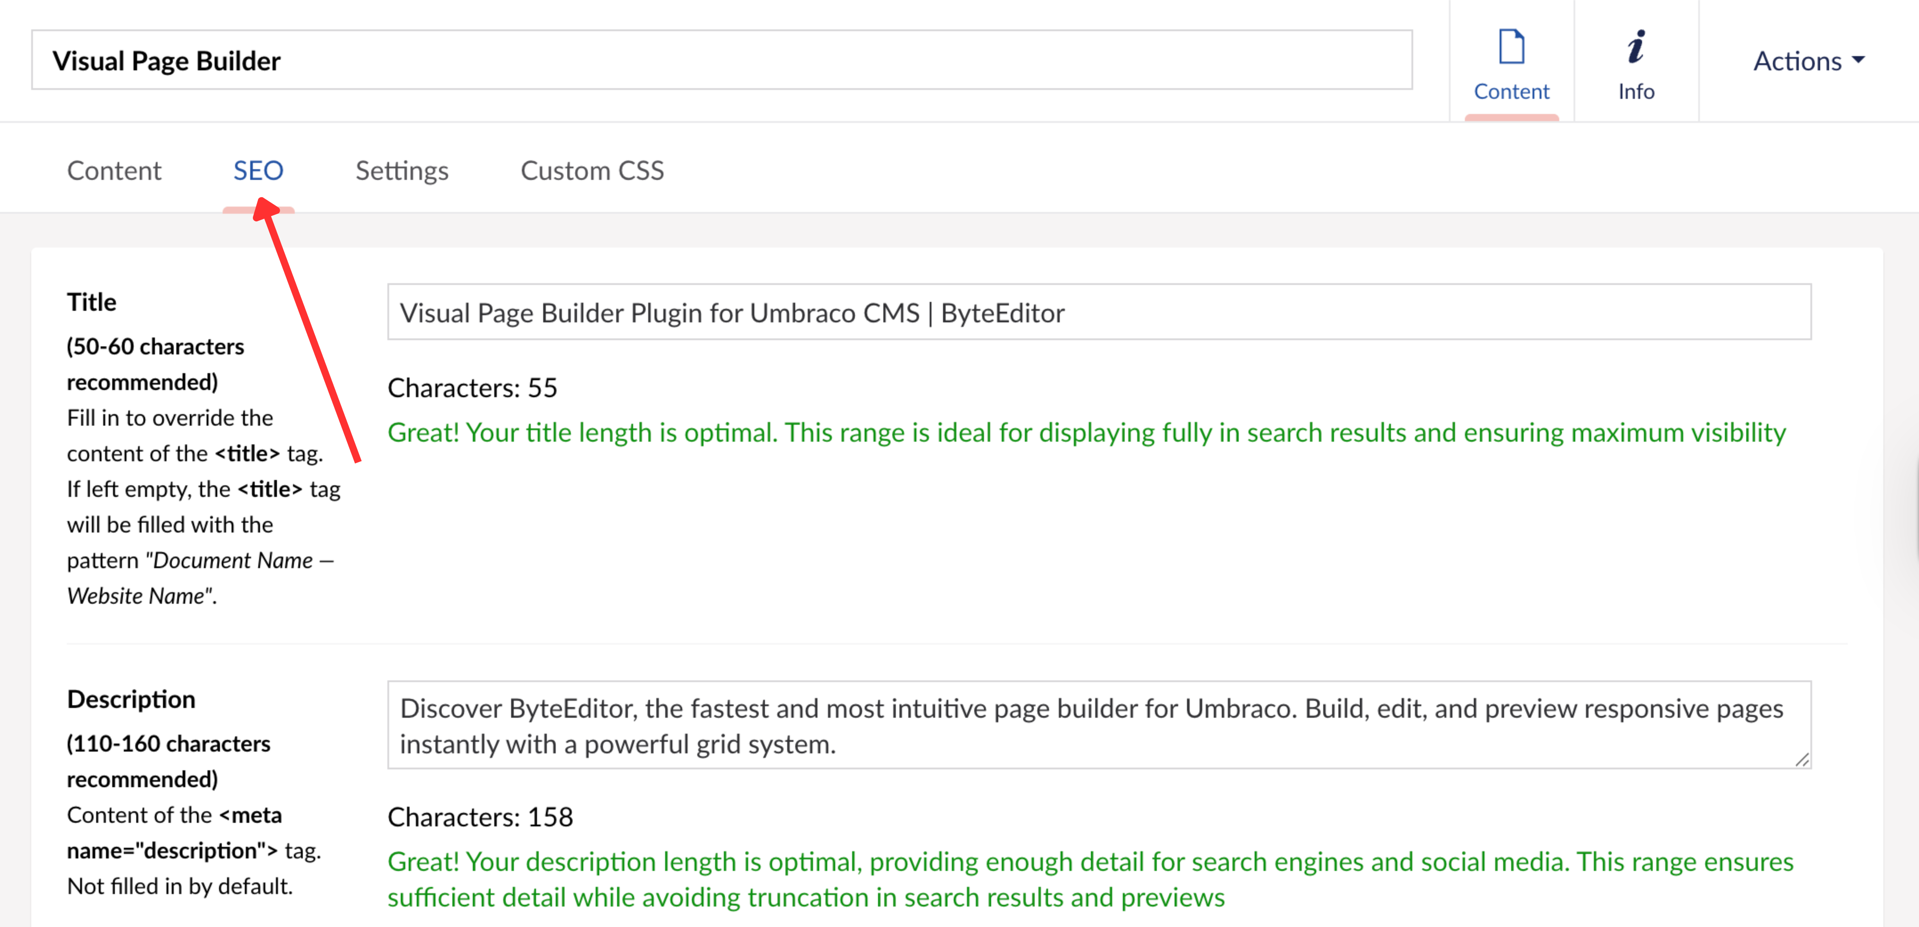
Step 6: Optimize your On-Page SEO
To make your page search engine friendly, click” SEO” tab. Enter meta tags, analyze and update page headers, check most used words, see page word and character count.
See our on-page SEO user guide for more information.
Step 7: Customize Your Website Design
Click Design in the Content Tree on the left side of the page to access all visual customization options.
Fully personalize your website’s appearance, pick your colors with color picker built-in, choose fonts, tweak button styles, upload your logo, and easily configure your header and footer layout, all in one place.
For more customization guidance refer to out Design Buider Guide.
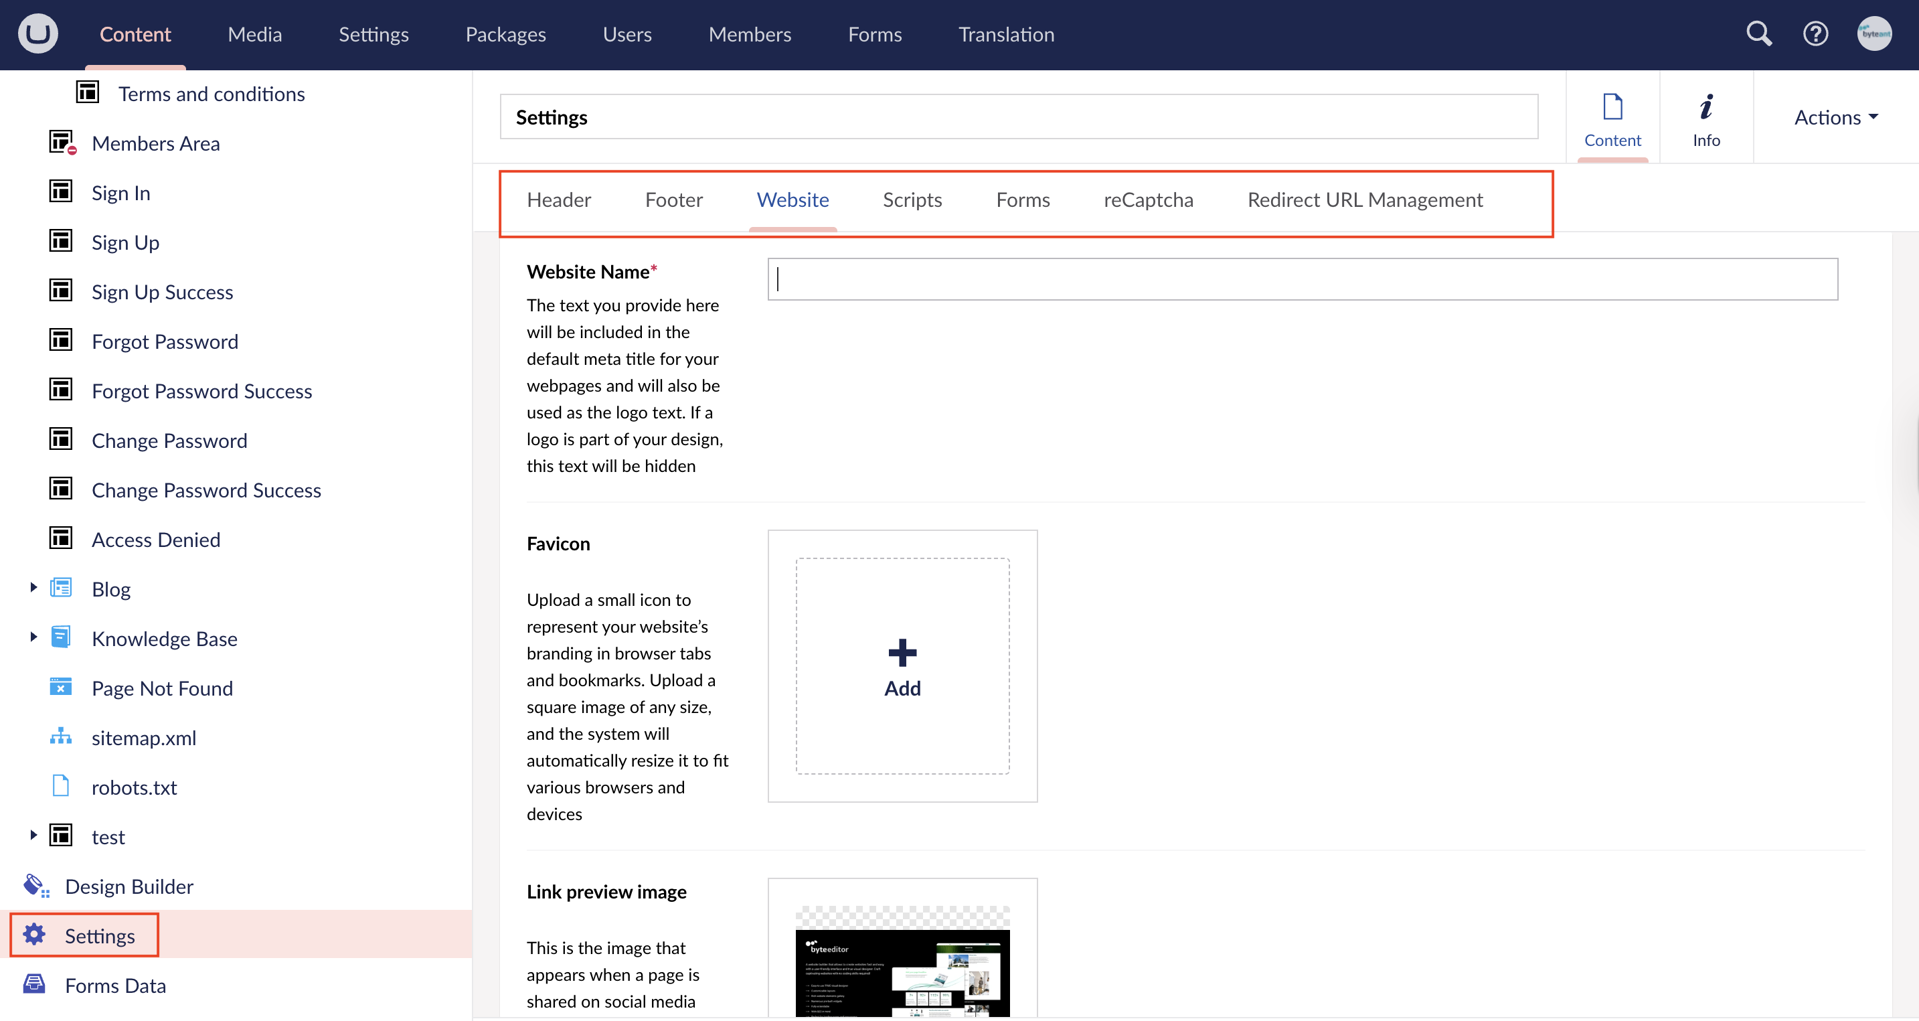
Step 8: Configure Site Settings
To set up the core details of your website, click Settings in the Content Tree on the left side of the page.
Here you can:
Manage header and footer entirely
Set-up your website Identity
Add scripts to all pages, like Google Tag Manager
Configure your ReCaptcha settings for forms
Manage page redirects
Don’t forget to click Save & Publish after making changes.