ByteEditor Website Builder
Custom Front-End
Guide to Creating a Website Based on Umbraco and ByteEditor with Custom HTML and CSS
⚠ Note
This guide provides step-by-step instructions on creating a website using Umbraco and ByteEditor with a custom front-end. The guide includes the process for adding a custom header and footer, using Block Grid and managing ByteEditor elements. The guide requires coding skills and Umbraco technical knowledge.
Step 1. Setting Up the Project
To customize your front end, start by installing and using ByteEditor Site Builder for Umbraco CMS. Follow one of our guides to set it up with either SQLite or MS SQL Server.

How to install the solution using SQL Light
Create your first website with our guidance in 10 minutes.

How to install the solution with MS SQL Server
Create your first website with our guidance in 10 minutes.
Once completed, the project will run on your local machine.

Step 2. Working with the Block Grid elements
To add your HTML and CSS, remove the default blocks and elements in ByteEditor. This will help avoid any conflicts with your custom code and styles.
-
Log in to the Umbraco backoffice.
-
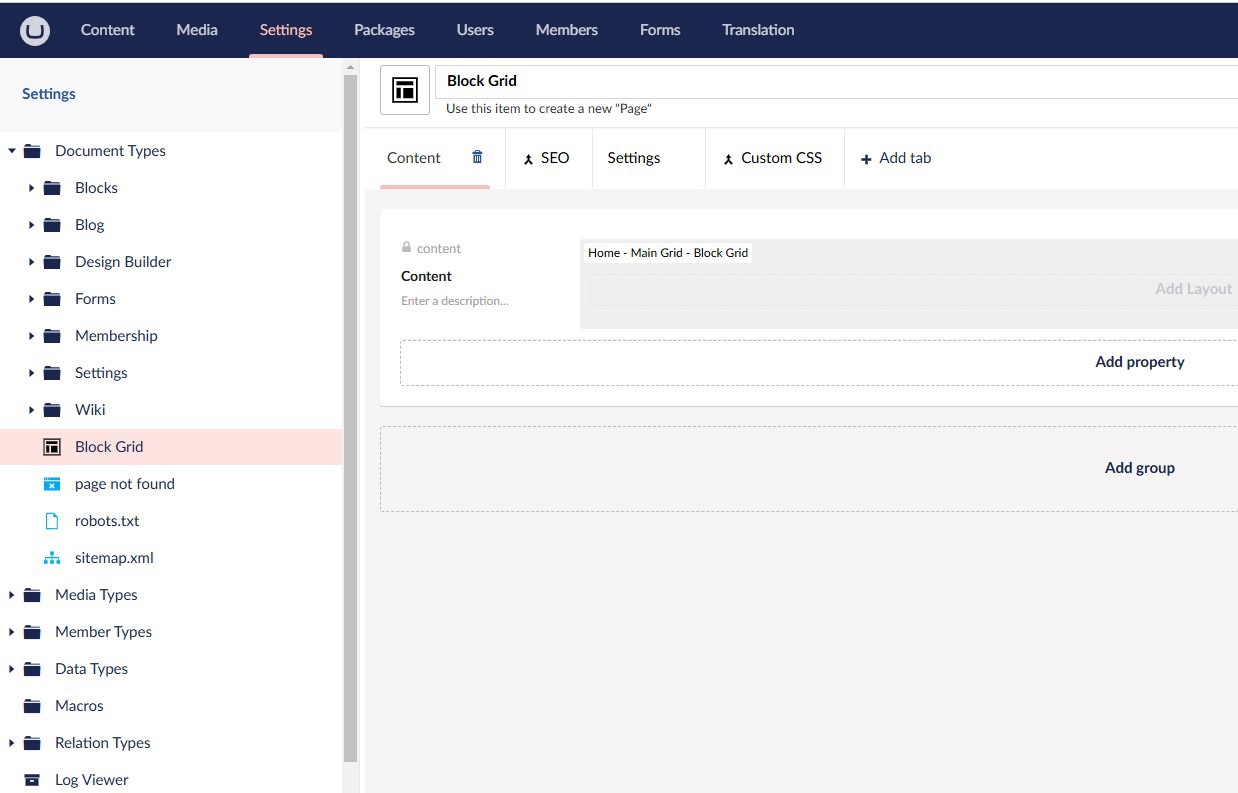
Navigate to the Settings section and the Document Types tab.
-
Select the Block Grid document type.
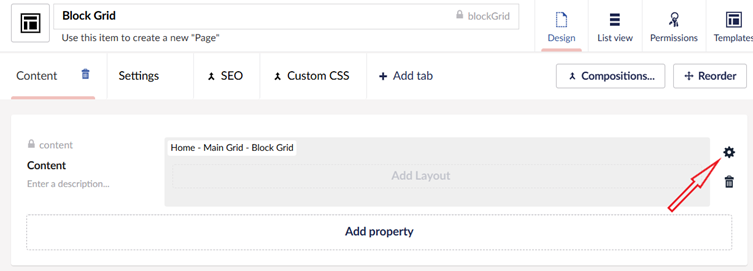
- Go to the Content property settings.

5. Access the Block Grid settings.

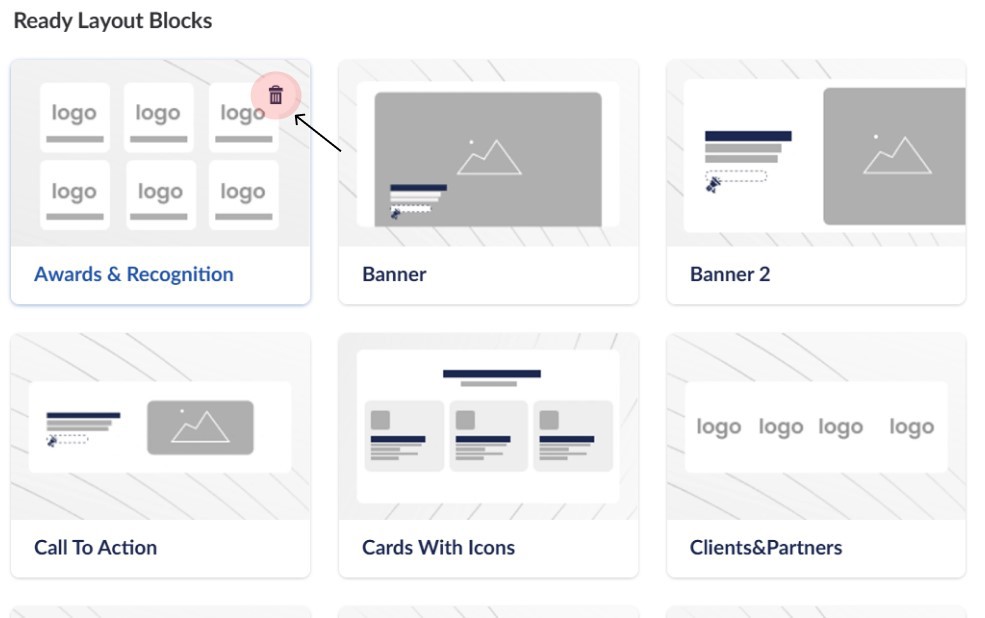
6. Delete the block you want to remove.

7. Save the changes by clicking the Submit button.
Step 4. Adding custom header and footer
Step 5. Creating custom layout, block and element
Create new element
Create new elements like cards using simple step-by-step instructions.